


3D printing has common problems that can make prints look bad or fail. If you want to get good prints every time, you need to know why these problems happen and how to fix them. This guide shows 14 common 3D printing problems and gives simple ways to solve them. This will help you print better.
1. Poor Bed Adhesion Causes Curling and Print Failure
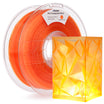
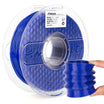
When a print doesn't stick well to the build surface, its edges can curl up or the whole print can fail, and this wastes time and material. This issue is often because of things like oils or dust on the bed, a wrong bed temperature, or a build surface that doesn't work for the filament type. For example, PLA sticks well to blue painter's tape, but ABS usually needs a heated PEI surface.
Quick Tips
- First, clean the bed with isopropyl alcohol, and do this right before you print.
- Set the gap between the nozzle and the bed carefully. A distance as thin as paper is usually best.
- You should use a brim or a skirt, so the bottom layer has a bigger area and the print is more stable.
Common Mistake
Raising the bed temperature too high to force adhesion can cause filament softening and warping instead of better sticking.
2. Bed Leveling Causes Uneven First Layer
| Step | Description | Common Problems | Solutions |
| 1. Turn off printer and cool nozzle | Avoid damage when adjusting bed. | Hot nozzle can damage bed. | Always wait for cool down before leveling. |
| 2. Adjust corner screws | Use the adjustment knobs to change bed height at each corner. | Uneven corners after adjustment. | Repeat adjustments; tighten screws properly. |
| 3. Insert a sheet of paper | Slide a piece of paper between nozzle and bed to check distance. | Too tight or loose gap. | Aim for slight friction but easy sliding. |
| 4. Check center of bed | Level the center similarly to ensure overall flatness. | Center is higher or lower. | Fine tune corner screws until center aligns. |
Why It Matters: An uneven bed causes irregular extrusion on the first layer, resulting in poor adhesion and print instability.
Expert Advice: Consider installing an automatic bed leveling sensor like BLTouch to improve precision and reduce manual effort.
3. Nozzle Not Properly Preheated Causes Extrusion Issues
If you start a print before the nozzle gets to the right temperature, you can have problems like not enough plastic coming out or jams. Some plastics, like PETG and Nylon, are very sensitive to the right temperature. This is because the nozzle can get clogged if the plastic is not all the way melted.
Scenario Example
When a user begins printing too soon, the filament can cool and harden inside the nozzle, causing inconsistent extrusion and defects.
Preventive Measures
- Always confirm the nozzle reaches the recommended temperature before printing.
- Use a heated enclosure or thermal insulation to maintain stable heat.
- Avoid frequent power cycles that cause temperature fluctuations.
4. Nozzle Clogging Disrupts Material Extrusion
Clogging interrupts smooth extrusion, causing gaps or blobs. Moisture in filament, burnt esidue, or debris inside the nozzle are common culprits.
Tips for Prevention
- Store filament in airtight containers with desiccants to keep it dry.
- Perform regular nozzle cleaning using cold-pull or fine needles.
- Use high-quality filaments and avoid running different materials without proper nozzle cleaning.
Quick Tip: Some printers offer automatic nozzle cleaning cycles—use them regularly to maintain performance.
5. Stringing During Printing
Stringing or "oozing" happens when melted filament leaks while the print head moves. This is often due to improper retraction settings or excessive nozzle temperature.
Adjustment Checklist
- Increase retraction distance or speed to reduce ooze.
- Lower nozzle temperature slightly within the recommended ranges.
- Slow down print speed during travel moves.
Recording Results: Keep notes of changes and test prints to find the ideal settings for each filament type.
6. Weak Layer Adhesion Causes Curling and Fragility
When layers do not bond properly, prints become fragile or edges curl. Low extrusion temperatures or strong cooling fans are common causes.
Tips:
- Increase nozzle temperature moderately to improve bonding.
- Reduce fan speed for the first few layers or disable it for ABS prints.
- Maintain a stable ambient temperature, ideally in an enclosed printer.
7. Loss of Detail and Dimensional Inaccuracy
Good, detailed prints need the right layer height and nozzle size. Big layers make printing faster, but they make small details look blurry. Size mistakes usually happen because the motors are not set up correctly or some parts are loose. So, the printed parts are too big or too small.
How to Check and Fix It
- Print test shapes, like cubes, so you can check if the size is right.
- Check and tighten the belts and pulleys often. This stops problems with sloppy printing.
- If your prints are always the wrong size, change the size settings in your slicer program.
A Common Mistake: If you don't fix parts that are wearing out, your prints will get worse over time. So, check your printer often to stop big problems later.
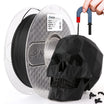
8. Difficulty Removing Support Structures
Removing supports can be tricky, especially on delicate models. Choosing the right support type and settings is key to easy removal and protecting your print's details.
Common Support Types
- Grid: Strong but hard to remove.
- Line: Easier removal but less stable.
- Tree: Minimal contact, best for delicate prints (needs advanced slicers).
How to Optimize Supports
To make taking supports off easier, you can use a lower support density. This uses less plastic and means the supports are less likely to stick to the model. Making the contact gap a little bigger also stops the supports from sticking too hard. Additionally, interface layers create a thin layer that is easy to break, and this helps the supports come off the model cleanly.
You should use small tools like flush cutters or needle-nose pliers. Use them to carefully take the supports off so you do not damage the model. For supports that dissolve in water, put them in warm water. This will make them soft and easy to remove. Afterward, you can sand the model a little bit to keep the finish looking good.
9. Internal Voids Affect Model Strength
Low infill ratios and thin walls lead to hollow, fragile prints that break under stress.
Strengthen Your Prints
- Increase infill to at least 20-30% for functional parts needing durability.
- Set walls or perimeters thicker to add shell strength.
- Run mesh repair tools (e.g., Meshmixer) to eliminate model defects before printing.
Tip: Voids hidden inside models can be tricky to spot—regular mesh checks save the material and frustration.
10. Rough Print Surface Increases Post-Processing Difficulty
A rough surface finish makes sanding, painting, or polishing far more time-consuming.
How to Get Smoother Surfaces
- Use smaller layer heights to reduce visible layer lines.
- Adjust fan speeds—too much cooling can warp layers and roughen texture.
- Slow print speed slightly to improve extrusion consistency.
Quick Fact: Sometimes a slight temperature tweak improves layer bonding and smoothness dramatically.
11. Mechanical Noise Indicates Issues
Unusual noises often point to poor lubrication, loose belts, or worn parts.
Maintenance Checklist
- Lubricate rods and lead screws regularly to reduce friction noises.
- Check belt tension and tighten to manufacturer specs.
- Calibrate stepper motors to prevent skipped steps and grinding sounds.
Warning: Ignoring mechanical noise can lead to bigger failures and damaged parts.
12. Causes of Print Job Interruptions
Unexpected print stops might be caused by unstable power, corrupt SD cards, or firmware bugs.
How to Prevent Interruptions
- Use an uninterruptible power supply (UPS) to guard against power outages.
- Opt for reliable SD cards and reformat them every few months.
- Regularly update your printer firmware for bug fixes and new features.
Real World Tip: Keeping firmware and software in sync reduces random crashes significantly.
13. Firmware and Software Settings Errors Affect Printing Stability
Wrong firmware or slicer settings may lead to layer shifts, extrusion inconsistency, or failed prints.
Avoid These Issues By
- Carefully review all slicer parameters before each print job.
- Keeping firmware current with official stable releases.
- Saving backups of known-good configurations to quickly restore if needed.
Common User Error: Updating firmware without checking compatibility with slicer profiles can introduce new problems.
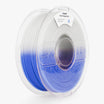
14. Moisture in Filament Causes Bubbling and Curling
Materials like Nylon absorb moisture from the air; during printing, this moisture vaporizes, creating bubbles and weak layers.
Storage and Handling Tips
- Store filaments airtight with desiccant packs to keep them dry.
- Use filament dryers or low-temp ovens to remove moisture before printing.
- Avoid printing immediately after removing filament from humid environments.
Pro Tip: Some printers have built-in filament drying features—consider investing if you print hygroscopic materials often.
Quick Troubleshooting and Common Mistakes
Clear steps help avoid random adjustments and frustration.
- Check hardware and filament first.
- Inspect bed and nozzle settings.
- Monitor environment changes.
- Avoid changing too many settings at once.
- Record adjustments for future reference.
Avoid relying solely on automatic software corrections and neglecting routine maintenance.
Conclusion on 3D Printing
To get good prints every time, you need to prepare well, use the printer the right way, and take care of it. Good settings and taking care of the machine help you get good prints. This information should help you fix common problems.