







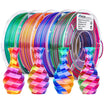
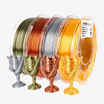
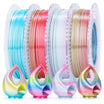
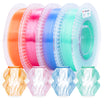
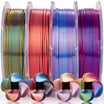
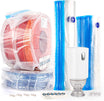
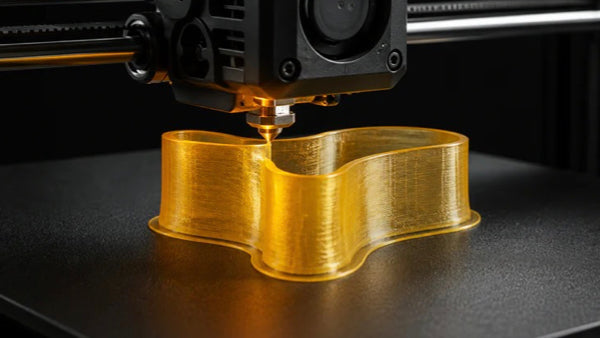
Your go-to reference for getting great results with TPU 95A, TPU 85A, and PEBA 90A — from your very first print to pro-level output.
Flexible filaments like TPU have opened up a whole new world of printable objects — phone cases, shoe insoles, gaskets, wearables, grip pads, and more. But if you've ever tried printing TPU and ended up with a stringy, tangled mess, you're not alone.
Flexible filaments behave very differently from PLA or PETG, and a few key adjustments make all the difference. This guide walks you through everything you need — from choosing the right material to dialing in your slicer settings.
What Is TPU Filament — And Why Does It Print Differently?
TPU stands for Thermoplastic Polyurethane. It's a flexible, rubber-like material that can be compressed, stretched, and bent without breaking — which is exactly what makes it great for functional parts, and exactly what makes it trickier to print.
Unlike rigid PLA, flexible filaments compress under pressure. This means your extruder can buckle the filament before it reaches the nozzle, especially on Bowden-style setups with a long filament path. Understanding this principle is the foundation for everything else in this guide.

Know Your Materials: TPU 95A vs. TPU 85A vs. PEBA 90A
The "A" number refers to Shore hardness — the lower the number, the softer and stretchier the material.
TPU 95A — Best for Beginners
TPU 95A is the most printable flexible filament available. It's firm enough to feed reliably through most printers, yet flexible enough for protective cases, boots, grips, and functional parts. If you're new to flexible printing, start here.
TPU 85A — Ultra-Soft, High Reward
TPU 85A is noticeably softer and more elastic than 95A. It excels at insoles, foam-like structures, and parts that need to compress deeply under load. It requires slower speeds, lower retraction, and more attention to your filament path — but the results are outstanding.
PEBA 90A — High Rebound Performance
PEBA (Polyether Block Amide) 90A offers exceptional energy return — the material behind high-performance shoe midsoles, airless basketballs, and lattice structures. It's lightweight, flexible, and prints surprisingly well for its class.

Quick Settings Reference
Use this as your starting point. Fine-tune based on your specific printer and model geometry.
| Parameter | TPU 95A | TPU 85A | PEBA 90A |
|---|---|---|---|
| Nozzle Temp | 220–240°C | 220–240°C | 230–260°C |
| Bed Temp | 35–60°C | 35–60°C | 50–70°C |
| Max Flow Rate | 2–5 mm³/s | 1–2 mm³/s | 2–4 mm³/s |
| Retraction | Low (0.5–1.2mm) | Very Low (0.2–0.6mm) | Low (0.5–1.2mm) |
| Retraction Speed | 15–30 mm/s | 10–20 mm/s | 15–30 mm/s |
| Cooling Fan | 80–100% | 80–100% | 50–80% |
| Drying Temp | 55–65°C | 55–65°C | 60–70°C |
| Drying Time | 4–8 hours | 4–8 hours | 4–8 hours |
| Recommended Nozzle | 0.4–0.6mm | 0.6mm preferred | 0.4–0.6mm |
| Print Difficulty | ★★☆☆☆ | ★★★★☆ | ★★★☆☆ |
* Retraction values vary significantly by printer and hotend design. Always start low and adjust incrementally.
Before You Start: Two Things That Matter Most
1. Use a Direct Feed Path When Possible
Flexible materials print best when the filament path is short and straight. Long Bowden tubes, sharp bends, and multi-material systems all add resistance that causes flexible filaments to buckle or jam.
If your printer uses a Bowden setup, consider installing a TPU feeding assist accessory or filament guide upgrade designed for your printer. Many users report dramatically better feed consistency after this simple upgrade.
2. Dry Your Filament — Every Time
This is the single most impactful thing you can do for print quality. Flexible filaments absorb moisture faster than PLA or PETG, and even a few hours of humidity exposure can cause:
- Excessive stringing and oozing
- Bubbling or popping during printing
- Rough or foamy surface texture
- Poor layer adhesion
- Inconsistent extrusion

Core Slicer Settings for Flexible Filaments
Print Speed: Go Slower Than PLA
Flexible materials compress more easily than rigid plastics. Printing too fast means your extruder pushes harder than the hotend can melt — causing under-extrusion, grinding, or jams. Use the max volumetric flow values in the table above as your ceiling. TPU 95A tops out around 2–5 mm³/s, compared to PLA which can handle 10–15 mm³/s.
Retraction: Keep It Low
Excessive retraction is one of the most common mistakes with flexible filaments. The golden rules:
- Softer materials always need lower retraction
- Start with the minimum and increase only if you see stringing
- If you must use longer retraction, reduce retraction speed and reload speed proportionally
- Excessive retraction causes grinding and clogging — always err low
Disable Dynamic Flow Calibration
Features like Dynamic Flow Calibration, Auto Flow Compensation, or Real-Time Flow Adjustment are optimized for rigid materials. Applied to flexible filaments, they often make extrusion worse. Disable these settings before your first print.
Cooling: Max It Out
Strong part cooling helps layers solidify quickly, supporting clean bridging, sharp overhangs, and better surface quality.
- TPU 95A and TPU 85A: 80–100% fan speed
- PEBA 90A: 50–80% fan speed
- Enclosed printers: open the front door or top cover when appropriate
Nozzle Size: Consider Going Bigger
For large models or thick-wall prints, a 0.6mm nozzle reduces extrusion pressure, lowers clog risk, and improves overall reliability — especially helpful for TPU 85A and PEBA 90A.
Getting Better Top Surface Quality
If your top layers look soft, saggy, or uneven, try these adjustments:
- Increase wall count to 3–5 perimeters
- Add more top solid layers (at least 4–6)
- Set infill density to 15–30%
For infill pattern, Gyroid is the top choice for flexible prints — it provides excellent structural support while preserving elasticity. Honeycomb and Cross Hatch are solid alternatives.
Printing for Energy Return: Insoles, Midsoles & Lattice Structures
Printing performance structures where rebound matters? One design tip makes a real difference: use double-wall structures instead of single-wall. Double-wall designs consistently outperform single-wall in energy return tests. Pair with PEBA 90A for maximum bounce-back performance.

Storing Flexible Filament Properly
Flexible filaments degrade quickly when exposed to ambient humidity. After every print session, store your filament in one of the following:
- A sealed dry box with desiccant
- An airtight zip-lock bag with silica gel packs
- A vacuum-sealed container
Target relative humidity below 20% RH whenever possible. Proper storage preserves print quality, surface finish, and the long-term elasticity of your filament.
Quick Start Checklist
Run through this before every flexible filament print:
- Dry filament for 4–8 hours at the recommended temperature
- Set print speed below your max volumetric flow limit
- Keep retraction low — start at the minimum
- Disable Dynamic Flow Calibration / Auto Flow Compensation
- Set part cooling fan to 80–100% (open enclosure if needed)
- Keep the filament path as short and straight as possible
- Consider TPU feeding assist upgrades for your printer
- Use a 0.6mm nozzle for large or detailed prints
- Increase wall count and infill if top surfaces need support
- Store filament in a dry box or sealed container after printing
Common Problems & Quick Fixes
| Problem | Most Likely Fix |
|---|---|
| Stringing / oozing | Dry the filament first. Reduce temp by 5°C. Lower retraction speed. |
| Filament grinding / skipping | Print slower. Lower retraction distance. Check path for kinks or tight bends. |
| Clogging | Reduce retraction. Check nozzle temp. Consider a 0.6mm nozzle. Ensure filament is dry. |
| Soft / collapsed top layers | Increase wall count to 3–5. Add top layers. Raise infill to 15–30%. Use Gyroid pattern. |
| Rough surface texture | Dry the filament — moisture is almost always the cause. Also try stronger cooling. |
| Under-extrusion | Lower print speed / volumetric flow. Check for partial clogs. Disable auto-flow calibration. |
Final Thoughts
Printing TPU and other flexible filaments isn't harder than printing PLA — it just requires a slightly different mindset. Once you understand that flexible filaments need slow speeds, low retraction, strong cooling, and dry filament, the results can be outstanding.
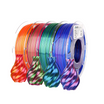
Whether you're prototyping a custom grip, printing a functional insole, or experimenting with lattice structures, Amolen's flexible filament lineup is designed to give you reliable results with minimal frustration. Start with TPU 95A, then explore TPU 85A and PEBA 90A when you're ready to push further.
Happy printing. 🖨️
Ready to print flexible?
Shop Amolen's full flexible filament lineup — TPU 95A, TPU 85A, and PEBA 90A. Free shipping on qualifying orders.
Shop Flexible Filaments →