


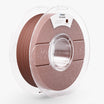


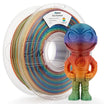


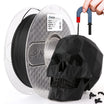
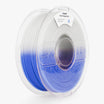
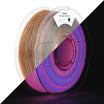

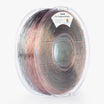
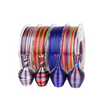


Yes, you can sand and paint silk PLA—but it doesn’t behave exactly like standard PLA. Its glossy finish and higher heat sensitivity mean you’ll need a softer touch and better prep. Knowing how to work with these differences will help you avoid ruining the surface during finishing. Silk PLA gets its sheen from additives that reflect light. That same shine resists abrasion and makes it harder for coatings to stick. Compared to matte PLA, it’s trickier to sand and paint, but not impossible.
How to Sand Silk PLA Properly
Sanding silk PLA helps smooth out layer lines or prep the surface for painting. It's doable, but not as straightforward as with other filaments.
When and Why to Sand Silk PLA
Sanding is useful when you want to clean up seams, reduce layer lines, or prep for painting. It’s especially helpful for props, models, and display pieces that need a clean, uniform look.
Light sanding also improves paint adhesion. Smooth, glossy surfaces tend to repel paint; adding a bit of surface texture gives the paint something to grip. Just keep in mind—where you sand, the natural gloss will fade.
Correct Sanding Technique
Start with fine-grit sandpaper—220 or 320 grit is ideal. Coarse paper may leave deep scratches, which are hard to fix later. Use light pressure, sanding in small circular motions to avoid heat buildup.
Wet sanding is highly recommended. It keeps the surface cool and prevents melting or warping. To reach a polished finish, work your way up: 800 grit, then 1500 grit for the final pass.
For tricky areas like grooves or corners, sanding sticks or nail files give you better control. After sanding, wipe the part with a damp microfiber cloth to remove dust or residue.
How to Paint Silk PLA Successfully
Painting silk PLA can dramatically enhance the look of your model, but success starts with good surface prep.
Prepping Silk PLA for Paint
Silk PLA's shiny finish doesn't take paint well unless you prepare it. Light sanding helps by creating tiny scratches that increase surface grip. Isopropyl alcohol is also useful—it removes oil and dirt from handling that could interfere with adhesion.
Primer is essential. Choose a matte spray primer or filler primer as your base layer. Apply two light coats rather than one heavy one. Allow proper drying time between coats to avoid pooling or soft spots.
Choosing the Right Paints
Several types of paint work well with silk PLA if you’ve primed properly:
| Paint Type | Suitable for Silk PLA | Notes |
| Acrylic | Yes | Flexible, easy cleanup |
| Enamel | Yes | Tougher, but slower to dry |
| Spray Paint | Yes | Best for large coverage |
| Oil-based | No | Poor adhesion may stay tacky |
Acrylics are great for detail work and layering. Enamels give a strong finish but need patience. Spray paints provide smooth, even coverage over larger areas. No matter what you choose, test on a hidden section first to be safe.
Additional Post-Processing Tips for Silk PLA Projects
Post-processing doesn’t stop with sanding and painting. If you’re assembling parts or prepping for long-term display, these extra steps can make your prints more durable and polished.
1. Surface Prep and Adhesive Selection
Before gluing, lightly scuff bonding areas with fine sandpaper. The glossy surface of silk PLA can resist adhesives without proper prep.
For most projects, cyanoacrylate (super glue) and two-part epoxy are solid options:
- Super glue works well for small parts and fast fixes, but may become brittle.
- Epoxy is slower to set but offers more flexibility and strength—ideal for larger or structural bonds.
Apply adhesives carefully. Use just enough to bond the surface without oozing. Make sure parts are properly aligned before moving on.
2. Proper Clamping During Curing
Glue isn’t enough by itself. Stable pressure during curing is key to a strong joint. Use clamps, rubber bands, or masking tape to hold pieces in place. Any shifting during the set time can weaken the connection or leave visible gaps.
Double-check the alignment from multiple angles before leaving the print to cure.
3. Applying a Clear Coat for Painted or Raw Silk PLA
Whether your model is painted or left raw, a clear water-based topcoat can help protect its surface from dust, fading, and wear.
Choose a finish—matte, satin, or gloss—based on the look you want. Always spray in thin, even layers, and let each coat fully dry before applying the next. Avoid heavy application, as thick coats can drip, crack, or blur fine details.
While sealing isn’t always required, it’s especially helpful for display pieces or anything that will be handled frequently.
4. Avoiding Harmful Solvents
Some filaments—like ABS—respond to chemical smoothing. Silk PLA does not. Acetone and similar solvents have little effect and may even warp or discolor the print.
Stick with water-based materials for cleanup and finishing. They’re safer and more compatible with PLA.
Common Mistakes to Avoid When Post-Processing Silk PLA
Here are the top issues people run into when working with silk PLA:
- Sanding too hard causes heat spots and dull patches.
- Skipping primer often leads to peeling paint.
- Thick paint layers can hide detail or crack as they dry.
- Painting damp prints results in bubbling or a foggy surface.
- Using acetone or smoothing agents has no effect and may damage the part.
Work slowly. Take care during each step, and the final product will reflect the extra effort.
When You Don’t Need to Post-Process Silk PLA
Sometimes, less is more. Silk PLA naturally produces vibrant, smooth prints. If your model already looks clean and the color fits your project, you might not need to do anything else.
Post-processing can actually reduce sharpness on detailed parts. For delicate features or thin structures, sanding or painting may do more harm than good.
If the print won’t be handled much or displayed in harsh conditions, leaving it raw can save time—and preserve its original finish.
Polished or Raw: The Art of Finishing Silk PLA
Silk PLA is paintable and sandable, but it takes a different approach than standard PLA. With the right prep, gentle sanding, and careful finishing, your models can look polished and professional. But don’t feel pressured—sometimes, a raw silk PLA print looks best just the way it is. Choose what works for your project and enjoy the process.