
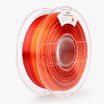


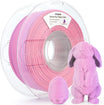


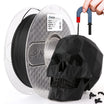
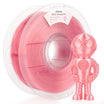

Glow-in-the-dark filament is a great way to add a unique, functional effect to your 3D prints, perfect for everything from fun toys to practical items like light switch covers. However, printing with it isn't as simple as swapping in a new spool of PLA. The material contains abrasive additives that create the glow effect, but these can wear out a standard brass nozzle very quickly. To avoid damaging your printer and to ensure clean, successful prints, you need to make a few key hardware and setting adjustments. This guide will explain the necessary steps to get great results.
What Makes Glow-in-the-Dark Filament Special?
To work effectively with this filament, it’s helpful to understand what it is and why it behaves the way it does. Its unique properties are both the source of its appeal and the cause of its primary printing challenge.
The Filament Absorbs Light and Releases It in the Dark
The glow effect comes from phosphorescent particles in the material, usually strontium aluminate. When you expose it to light, these particles absorb and store energy. After the light is turned off, they slowly release that stored energy as visible light, which creates the glow. This process can be repeated many times.
It Uses Standard PLA or PETG Print Settings
The base plastic for glow-in-the-dark filament is typically just PLA or PETG. This is good news, as it means the printing temperature, bed settings, and other parameters are very similar to the standard materials you're already familiar with. If you know how to print PLA, you won't find glow-in-the-dark PLA difficult to print with.
Glow Particles Will Destroy a Standard Brass Nozzle
This is the most critical point: the particles that create the glow are extremely hard. As the filament moves through your nozzle, these hard particles constantly rub against the inner walls, acting just like sandpaper. A standard brass nozzle will be worn down very quickly, leading to under-extrusion, poor accuracy, and eventually, failed prints.
How to Prepare Your Printer for Abrasive Filament
Attempting to print glow-in-the-dark filament without the correct hardware is a common mistake. The material's abrasive nature will quickly damage standard components, leading to a host of printing problems that can be easily avoided with simple preparation.
You Must Replace Your Brass Nozzle with a Hardened One
A standard brass nozzle, which comes with most 3D printers, is too soft for abrasive materials. The constant flow of hard phosphorescent particles will rapidly grind away the nozzle's inner wall, widening its opening. A 0.4mm nozzle might become a 0.5mm or 0.6mm nozzle after printing just a few hundred grams of filament. This damage causes severe under-extrusion, weak and stringy prints, loss of detail, and poor dimensional accuracy.
To prevent this, you must upgrade the nozzle.
- Hardened Steel: This is the most popular and cost-effective solution. A hardened steel nozzle offers excellent abrasion resistance and is the standard choice for printing any abrasive filament.
- Ruby or Tungsten Carbide: These are premium options offering extreme durability. They often provide better thermal conductivity than steel, but their high cost is generally unnecessary unless you print with abrasive materials almost exclusively.
The Filament Can Also Wear Other Parts Over Time
While the nozzle takes the most damage, the abrasive filament can also cause gradual wear on other components in the filament's path.
- Extruder Gear: The toothed gear that pushes the filament can also wear down, especially if it is made of brass. Periodically inspect it for flattened teeth. Upgrading to a steel gear is a worthwhile long-term investment.
- PTFE (Bowden) Tube: In a Bowden setup, the filament can slowly scrape the inside of the tube. This increases friction and can eventually contribute to extrusion problems. It is good practice to inspect the tube for signs of internal scoring if you frequently print with abrasive materials.
How to Tune Your Slicer for Glow-in-the-Dark Prints
Once your hardware is prepared, you can turn your attention to your slicer settings. A few targeted adjustments will significantly improve the quality of your prints and the intensity of their glow.
Printing Temperature
Always begin with the temperature range recommended by the filament manufacturer, which is typically around 190-220°C for PLA-based glow filaments. The additives can sometimes require slightly higher temperatures than standard PLA to achieve a good flow and strong layer adhesion. Printing a temperature tower is an excellent way to determine the optimal temperature for your specific brand and printer.
Nozzle Size and Layer Height
For a brighter and longer-lasting glow, you should aim to lay down more material. A larger nozzle, such as 0.5mm or 0.6mm, combined with thicker layer heights of 0.2mm to 0.3mm, embeds a higher concentration of phosphorescent particles into the print's surface. This directly translates to a more intense glow. As a significant secondary benefit, a larger nozzle is much less likely to clog, as it can more easily pass any small clumps of particles that may be present in the filament.
Wall Thickness and Infill
The glow effect is only visible on the exterior surfaces of your print. To maximize this, increase the number of walls (perimeters). Setting the wall count to 3 or 4 will create a solid, thick outer shell that is rich with glow particles. Since the interior of the model does not contribute to the glow, you can often reduce the infill percentage to 10-20%. This saves a considerable amount of material and printing time without compromising the strength of most decorative parts.
Print Speed
Glow-in-the-dark filaments can be more brittle than their standard counterparts. It is wise to start with a slightly slower print speed than you would for regular PLA, somewhere in the range of 40-50 mm/s. Slower speeds reduce the stress on the filament, improve layer adhesion, and generally lead to higher overall print quality.
Retraction
The additives in glow filament can make it more susceptible to stringing and oozing. You will likely need to fine-tune your retraction settings. Try slightly increasing your retraction distance or speed to combat this. Printing a dedicated retraction test model is the most efficient way to dial in the perfect settings for your machine.
Best Practices for a Smooth Printing Experience
A few final considerations during the printing process itself will help ensure a successful result from start to finish.
Always Start with Dry Filament
Like most materials, glow-in-the-dark filament absorbs moisture from the air, which makes it brittle and leads to poor print quality (e.g., popping sounds from the nozzle, rough surfaces). If a spool has been open for a while, it is highly recommended to dry it in a dedicated filament dryer before use to ensure a clean print.
Purge the Nozzle When Changing Materials
When switching to or from glow-in-the-dark filament, make sure to purge the nozzle thoroughly. This clears out any residual color from the previous material. More importantly, it ensures you have removed all the abrasive glow particles before loading a standard, non-abrasive filament and printing with your regular brass nozzle.
Pay Close Attention to the First Layer
A successful print always begins with a perfect first layer. Before you start, ensure your print bed is clean and level. Check that your nozzle height is set correctly to get strong adhesion. A PEI build surface works exceptionally well for this material, but a bit of glue stick on a glass bed is also a reliable method.
How to Get the Brightest Glow from Your Glow-in-the-Dark Filament
With your successful print in hand, the final step is to make its signature glow as bright and long-lasting as possible.
Use UV Light for the Brightest Glow
To "charge" the print, expose it to a light source. A UV flashlight or blacklight is by far the most effective method, energizing the phosphorescent particles almost instantly for an exceptionally bright result. Direct sunlight is also a great option due to its natural UV rays. While standard indoor LED or fluorescent lights will work, the charging process will take much longer, and the resulting glow will likely be less intense.
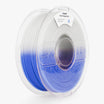
Set Expectations: Color Affects Glow Performance
The glow will always be at its peak brightness immediately after charging and will gradually fade over time. The filament's color also plays a significant role in its performance. Green-glowing filament typically shines the brightest and for the longest duration. Blue is also a strong performer. Other colors, such as red or purple, use different phosphors that result in a much weaker and shorter-lived glow.
Illuminate Your 3D Prints Today!
With the right hardware and carefully tuned settings, you are fully equipped to conquer the challenges of glow-in-the-dark filament. Remember that a hardened nozzle is not optional; it is the foundation of your success. By increasing wall thickness and using a larger nozzle, you can produce objects with a brilliant, long-lasting luminescence. Now, go put this knowledge into practice and bring your glowing creations to life.