


Getting a great 3D print with PLA often comes down to getting the temperature right, but it's more complicated than just picking a single number for the nozzle. That recommended temperature on the filament spool is only a starting point. The reality is that PLA doesn't have one fixed melting point. Instead, it has key thermal properties that operate across a range. How you manage this temperature range directly impacts your printer settings, how fast you can print, and whether you end up with a strong, clean part or a failed one.
PLA's Key Temperatures: Glass Transition and Melting
To control PLA well, it helps to know that it doesn't just switch from solid to liquid. It actually goes through two separate thermal stages, and both are important for 3D printing.
Glass Transition Temperature (Tg ): For the Heated Bed
The glass transition temperature, or Tg, is the point where PLA changes from a hard, brittle material into a soft, rubbery one. For most PLA filaments, this happens in the 60-65°C (140-149°F) range. Below this temperature, PLA is completely solid and rigid; above it, it becomes pliable enough to deform.
This property is the main reason a heated print bed works so well. By setting the bed temperature at or slightly above PLA's Tg, the first few layers of the print stay soft and slightly sticky. This prevents them from cooling down too fast and shrinking, which pulls the corners of the model up and causes it to detach from the bed. This lifting is called warping, and keeping the base of the print warm is the best way to stop it.
Melting Temperature (Tm ): For the Nozzle
Much higher than the glass transition temperature is the melting temperature, or Tm. This isn’t one specific point but a broader range, usually between 180-220°C (356-428°F). In this range, the PLA becomes a liquid that is thin enough to be pushed smoothly through the printer's nozzle, a process known as extrusion.
The specific temperature you choose in this range controls the filament's viscosity—in other words, how runny it is. This directly affects important factors like how well layers stick together, the consistency of the flow, and the surface quality of the final print. Choosing the right nozzle temperature means finding a balance that works for your specific filament and printing goals.
Bed Temperature vs. Nozzle Temperature
It's easy to get these two temperatures mixed up, but they have very different jobs. The simplest way to remember their roles is:
- Glass Transition Temperature (Tg ) determines your heated bed temperature. Its purpose is to keep the print stuck to the bed and prevent warping.
- Melting Temperature (Tm ) determines your nozzle temperature. Its purpose is to melt the plastic so it can be extruded and form strong layer bonds.
How PLA's Key Temperatures Determine Print Settings
Your PLA's temperature behavior affects the four main settings in your slicer software: nozzle temperature, bed temperature, cooling, and print speed. Getting these right is key to a good print.
Set the Right Nozzle Temperature
This is the most direct use of the melting point, and setting it incorrectly is the fastest way to get a failed print.
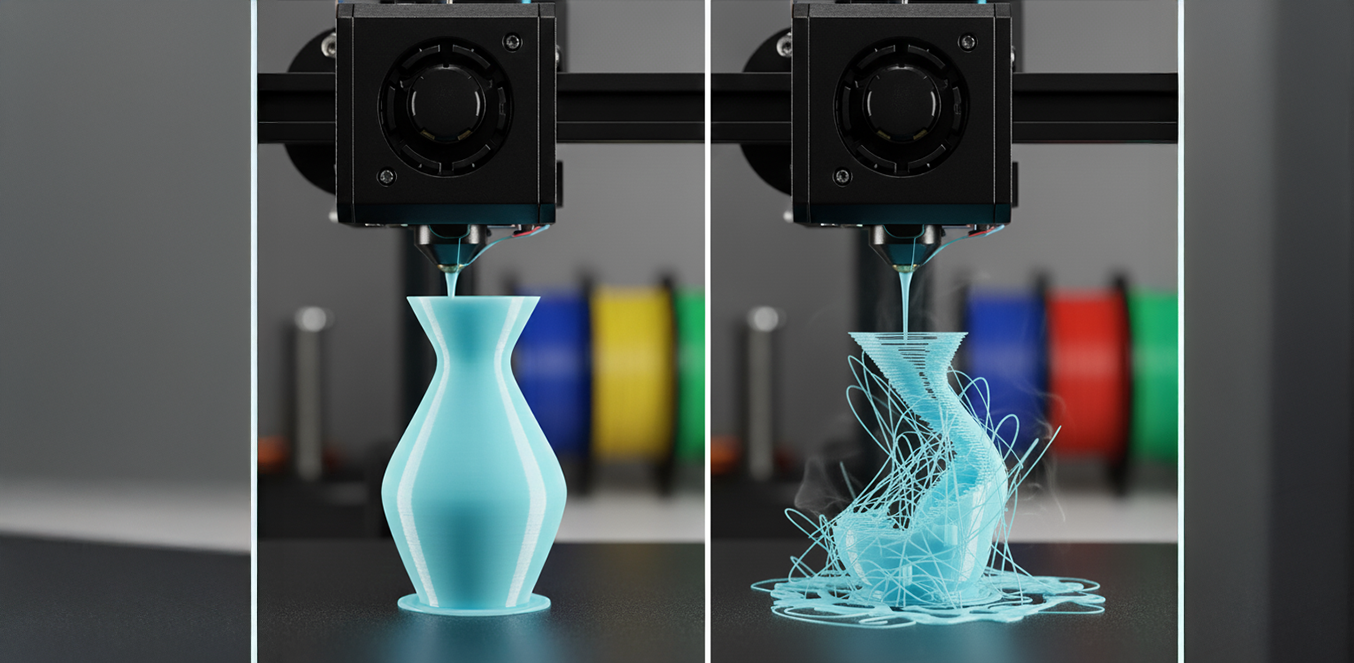
- Too Low: If the nozzle is not hot enough, the filament won't melt properly as the extruder pushes it through. This causes under-extrusion, where you see thin, inconsistent, or even missing lines of plastic. The layers that are deposited won't be hot enough to fuse together, leading to very poor layer adhesion and parts that are fragile and snap apart easily. In the worst case, the partially melted plastic can harden inside the nozzle and cause a clog.
- Too High: Excessive heat creates a different set of problems. The PLA becomes too runny and drips from the nozzle during movements, creating fine plastic wisps known as stringing. Heat can also travel too far up the hotend (an issue called heat creep), softening the filament too early and causing a jam. Very high temperatures will also lead to a loss of detail, as sharp corners and small features may sag or deform. Finally, you risk degrading the material itself, causing the PLA to scorch or bubble, which changes its color and reduces its strength.
The most reliable way to find the best nozzle temperature for a new spool of filament is to print a "Temperature Tower." This calibration model prints the same shape at several different temperatures, letting you see exactly which setting gives you the best mix of layer adhesion, surface quality, and bridging.
Set the Heated Bed Temperature
The purpose of the heated bed is to keep the print's first layers above their glass transition temperature (Tg ) to ensure they stick securely. For PLA, typical settings are in the 50-65°C range. If your bed temperature is below this, especially in a cool room, your print is much more likely to warp and detach from the bed. Setting the temperature significantly higher than 65°C offers no real benefit for PLA, wastes electricity, and can even make the first few layers of the print too soft.
Control the Part Cooling Fan
The part cooling fan blows air on the freshly laid plastic to help it harden quickly. The fan's speed needs to be balanced with the extrusion temperature. Proper cooling is essential for printing clean overhangs (steep angles) and bridges (gaps between two points) without drooping or sagging. It also helps preserve fine details. However, there is a crucial trade-off: too much cooling can chill the plastic so fast that it doesn't have time to form a strong bond with the layer below it. This can reduce layer adhesion and make the final part weaker.
Balance Print Speed and Temperature
Print speed and nozzle temperature are directly linked. The faster the print head moves, the less time the filament has to melt inside the hotend. To make up for this, the nozzle temperature must be increased to ensure the filament can melt fast enough. If you try to print at a high speed with a standard or low temperature, the nozzle won't get enough molten plastic, which will result in severe under-extrusion.
How Temperature Affects Strength, Finish, and Accuracy
The numbers you dial into your slicer are not abstract; they have a direct and visible impact on the physical characteristics of your finished part. Here is how temperature affects the three most important outcomes: strength, appearance, and precision.
Mechanical Strength
The most important factor for a strong part is good layer adhesion. Printing at the higher end of a filament's recommended temperature range generally promotes better bonding between layers. This creates a more solid part that is tougher and less likely to split apart under stress.
Surface Finish and Aesthetics
Temperature selection can be an artistic choice. Higher temperatures tend to produce a glossier, shinier surface finish, while lower temperatures often result in a more matte look. On the other hand, incorrect temperatures are a primary cause of visual defects like stringing, blobs, and zits that can ruin the print's surface quality.
Dimensional Accuracy
Precision can be compromised by excessive heat. Printing too hot can cause the lower layers of the print to sag under the weight and heat of the layers above them. This is especially noticeable on the first few layers, where it creates a bulge known as "elephant's foot," which ruins the part's intended dimensions.
Factors That Change PLA's Printing Temperature
Never assume that one temperature profile will work for all your PLA filaments. The effective printing temperature of a specific PLA is altered by numerous factors, which is why calibration is so important for each spool.
Additives and Colors
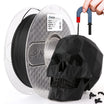
Different pigments and composite additives mixed into the base PLA polymer can significantly change how it responds to heat. A black PLA filament from one brand, for instance, might require a nozzle temperature 5-10°C higher than the white PLA from the same brand due to the properties of its colorant. Likewise, PLA filaments infused with materials like wood, carbon fiber, or metallic powders will have their own unique temperature requirements.
Specialty PLA Blends
Formulations like PLA+ or "Tough PLA" are modified with other polymers to enhance specific traits like impact resistance or heat tolerance. These modifications almost always alter the PLA's ideal glass transition and melting temperatures.
Brand and Manufacturing Batch
There is no universal, industry-wide standard for PLA formulation. The exact blend of polymers, additives, and colorants can vary significantly between manufacturers and even between different production batches from the same company. Always start with the temperature range recommended by the manufacturer on the spool, but treat it as a starting point for your own calibration, not as an absolute rule.
Apply Temperature Precision to Your 3D Printing!
The thermal behavior of PLA is the cornerstone of successful Fused Deposition Modeling. Its melting point is not a static figure but a working range that governs nozzle and bed settings, moderates print speed, and works in tandem with cooling. The quality of your final print—its strength, its accuracy, its visual appeal—is a direct reflection of how well you balance these properties. The path to superior prints is not a search for a single number, but a process of careful calibration to find the optimal thermal balance for each specific filament you use.


